When temperatures fall, an outdoor water valve can become a quiet plumbing hazard. Water trapped inside the valve, hose, or connected pipe expands as it freezes. That pressure may split fittings behind the wall, where damage stays hidden until spring.
This guide explains how to winterize outdoor water valves to prevent freezing with practical, field-tested steps. Richard Trethewey, a plumbing and heating expert known for This Old House, offers a useful warning: “Don’t wait for the first hard freeze to prepare your plumbing.” His advice reflects a common service-call lesson. Preparation works best before ice appears.
You will learn how to disconnect hoses, shut off interior supply lines, drain exposed sections, and inspect valve types. Frost-free hose bibs still need attention. They can fail when a hose remains attached, because trapped water cannot drain properly. A small mistake. A costly repair.
Look closely at the valve body, wall penetration, and nearby insulation. Feel for dampness. Check for cracked washers or slow drips. These details often reveal trouble before winter causes serious damage. The process is simple, but it is not foolproof. Older homes may have unusual pipe layouts, frozen shutoff valves, or poorly sloped lines. In those cases, guessing can make the problem worse.
Use this introduction as a practical starting point, not a substitute for judgment. If a valve leaks after shutting off, or the indoor shutoff cannot be located, contact a qualified plumber. A careful winterization routine can protect your plumbing, reduce emergency repairs, and preserve water service through the coldest nights.
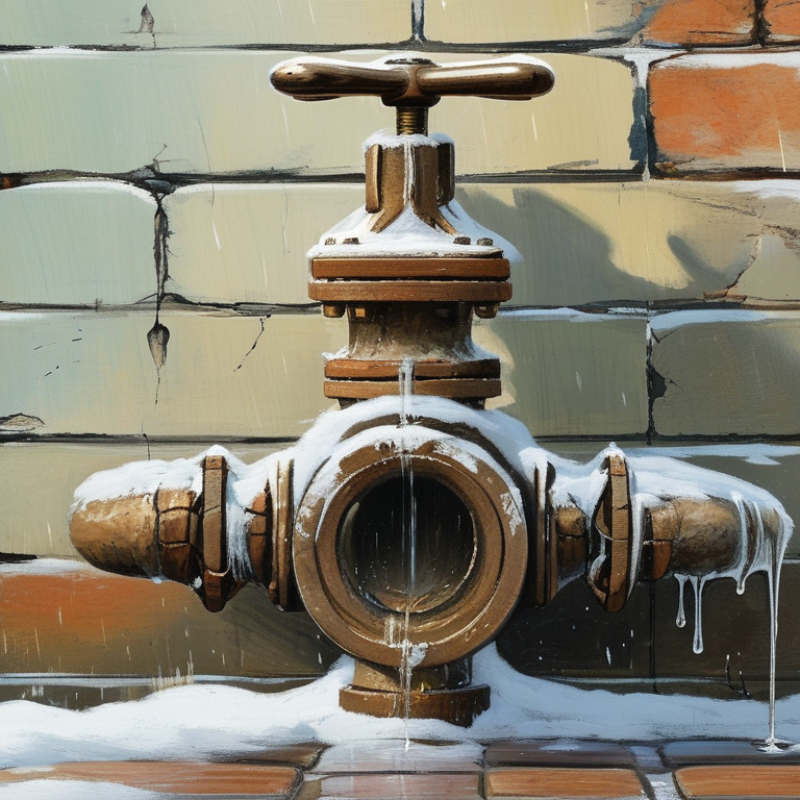
Outdoor water valves freeze because water remains inside them after temperatures drop below 0°C. Water expands as it freezes. That expansion creates intense pressure inside the valve body and connected pipe. The valve may split, even when the damage is invisible from outside. Problems often appear during spring thaw. Cold air finds gaps. Wind, shade, and unheated walls increase heat loss. A valve on a north-facing wall may freeze before nearby indoor pipes.
During field inspections, I often find that homeowners close the indoor shutoff but leave a hose attached. The trapped water has nowhere to drain. I once assumed a thick cover was enough. That assumption was wrong. Insulation slows heat loss; it does not remove water from the valve. If the valve drains poorly, ice can form around internal seals and weaken them. Small cracks matter.
Before winter, disconnect hoses and close the interior shutoff. Open the outdoor valve to release pressure and drain remaining water. If a drain cap exists, remove it carefully. Check for dripping. A slow leak can keep the valve wet and increase freezing risk. For exposed piping, use approved insulation and protect it from rain. Do not rely on a single cold-weather forecast. One mild afternoon can hide water behind the shutoff, while overnight temperatures may freeze it quickly.
Before winterizing an outdoor water valve, place the right tools beside the work area. You need an adjustable wrench, bucket, absorbent towels, flashlight, pipe insulation, and waterproof gloves. Add eye protection if the valve is corroded. A small brush can remove dirt from the threads. Keep a phone nearby for emergency instructions, not as a substitute for inspection.
Shut off the indoor supply valve before disconnecting the hose. Open the outdoor valve and let trapped water drain into the bucket. Never force a stiff handle. Use gentle pressure, or contact a licensed plumber. The U.S. Department of Energy recommends insulating exposed water lines and sealing cold-air leaks around service openings. For powered heat tape, use only approved equipment with a ground-fault circuit interrupter outlet. Never use a torch or improvised heater.
The Insurance Information Institute, using ISO data, reports that water damage and freezing represented about 29.6% of homeowners’ insurance claims from 2017 to 2021. The average claim was approximately $12,514. That figure makes a $10 roll of insulation seem cheap.
Still, insulation alone cannot fix a leaking valve. Check the washer, hose connection, and indoor shutoff for drips. I sometimes forget the valve cap, especially during rushed maintenance. That small mistake can expose the opening to snow, wind, and ice. Photograph the finished setup and recheck it after the first hard freeze.
When winter approaches, shut off the outdoor water supply before temperatures fall below freezing. The Insurance Information Institute reported that water damage and freezing caused 29.7% of homeowners insurance claims from 2017 to 2021. A forgotten garden valve can become an expensive failure point.
Locate the interior shutoff valve serving each outdoor faucet. Turn it clockwise until it stops, but do not force it. Open the outdoor faucet fully, then remove hoses, splitters, and timers. Let trapped water drain into a bucket. If the valve has a small bleeder cap, open it carefully and close it after drainage. Check for a slow drip. That detail matters.
I check the basement side of the pipe, not only the faucet. A few minutes with a flashlight can reveal damp insulation, corrosion, or a cracked fitting. The U.S. Department of Energy recommends insulating pipes in unheated areas, especially near exterior walls and crawl spaces. Add approved pipe insulation after draining, leaving access to shutoff controls. Do not seal a wet pipe inside insulation. I once rushed that step, and the hidden moisture caused a larger repair later. In severe cold, open interior cabinet doors near plumbing and maintain gentle indoor heat. A low-cost temperature sensor can help, though it is not a substitute for physically checking the valve.
How to Winterize Outdoor Water Valves to Prevent Freezing
Insulating Exposed Valves and Connecting Pipes
Outdoor valves often freeze at the smallest exposed gap. Start by disconnecting hoses, shutting off the indoor supply, and opening the valve until no water remains. A trapped teaspoon can expand and split a fitting. The Insurance Institute for Business & Home Safety reports that a crack only one-eighth inch wide may release over 250 gallons of water daily. That figure makes a small valve worth careful attention.
Wrap the valve and connecting pipe with closed-cell foam insulation. Cover every joint, including the short section entering the wall. Add a waterproof valve cover, but do not compress insulation until it becomes thin. Moisture can enter through loose seams. The U.S. Department of Energy recommends insulating accessible water pipes to reduce heat loss and protect vulnerable plumbing. However, insulation slows freezing rather than creating heat. In severe weather, keep the indoor shutoff closed and inspect the valve after thawing.
Tips: Remove hoses before the first hard freeze. Seal wall openings with suitable exterior-grade material. Never use an open flame to thaw a pipe. A hair dryer can work slowly, but electrical safety matters around water. I once focused on the valve body and ignored the uninsulated elbow behind it. That weak point was easy to miss. Check the full connection path, not only the visible cap. Recheck covers after wind, rain, or heavy snow.
When freezing weather begins, inspect outdoor water valves every morning. Do not assume a drained line stayed empty. The Insurance Information Institute, using ISO data from 2017–2021, reported that water damage and freezing caused about 19.9% of homeowners insurance claims. The average claim exceeded $12,000. A small defect deserves attention.
Touch the valve, connector, and nearby pipe. Look for frost, bulging, hairline cracks, or damp soil. Open the valve briefly, then close it firmly without forcing the handle. If water flow is weak, shut off the interior supply and investigate. Never use an open flame to thaw a frozen section. The U.S. Department of Energy recommends protecting exposed plumbing and maintaining safe indoor temperatures during cold conditions. Yet this guidance is easy to overlook when a valve appears dry.
Tips: Check after each severe freeze, especially before sunrise. Use a flashlight, not guesswork. Keep cabinet doors open near interior shutoff pipes. If thawing starts, listen for hissing and watch for sudden leaks. Replace damaged insulation after the weather improves. A practical mistake is checking only the valve body; buried connections and wall penetrations can fail later. Record photos and readings, even when nothing looks wrong. That small record can reveal a pattern across several cold nights.
: Disconnect the hose and shut off the indoor water supply. Open the outdoor valve until no water remains. Even a teaspoon can split a fitting.
Cover the valve, connecting pipe, joints, and wall-entry section. Use closed-cell foam insulation with a waterproof cover. Do not flatten the foam too tightly.
No. Insulation slows freezing but does not create heat. During severe cold, keep the indoor shutoff closed. Inspect the valve after temperatures rise.
Inspect the valve every morning, especially before sunrise. Look for frost, bulging, cracks, damp soil, or weak water flow. Use a flashlight.
Open it briefly, then close the handle firmly. Do not force a stiff handle. Weak flow may indicate a frozen section or hidden damage.
Shut off the indoor water supply and investigate carefully. Never use an open flame. A hair dryer may thaw the area slowly, but keep electricity away from water.
Check elbows, buried connections, wall openings, and short pipe sections. I once inspected only the valve body and missed an uninsulated elbow. That mistake matters.
Listen for hissing and watch for sudden leaks. Replace damaged insulation after the weather improves. Photograph the valve and nearby pipe. Small records reveal repeated problems.
Learning how to winterize outdoor water valves to prevent freezing can help protect your plumbing from costly damage during cold weather. Outdoor valves and exposed pipes freeze when trapped water expands, potentially causing cracks or leaks. Before beginning, gather adjustable pliers, a bucket, towels, insulation materials, and suitable protective equipment. Turn off the outdoor water supply, disconnect hoses, and open each valve to allow remaining water to drain completely. Check low points and connected pipes carefully, since hidden water can also freeze.
After draining, wrap exposed valves and pipes with weather-resistant insulation, making sure the covering fits securely without blocking necessary drainage or access. Seal gaps where cold air may enter, but avoid creating areas where moisture can collect. Once freezing weather begins, inspect the system regularly for loose insulation, ice buildup, leaks, or unusual pressure. If temperatures rise, examine the valves again for cracks and confirm that water flows normally before returning the outdoor supply to regular use.

Maria Valve